We hope this article helped you learn everything you needed to know about how to identify and fix a broken battery. Thanks for reading!
Hybrid battery repair
Apple is increasing service charges for battery replacement in out-of-warranty iPhones, iPads, and MacBooks starting March 2023. The price rise ranges from $20 to $50 for different kinds of devices.
Remove the screws holding the battery together. There's a hidden screw under a piece of plastic. You need to pry the plastic off to get at the screw underneath. I used a very thin screwdriver to pry it off.
.
Battery repairs
Apple in an internal document obtained by MacRumors said customers are entitled to a $29 battery replacement "regardless of diagnostic result," and it doesn't matter if the iPhone is no longer covered by Apple's one-year limited warranty or extended AppleCare+ plan to qualify for the price reduction.
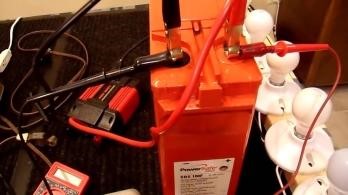
Before beginning, if haven’t already, considering getting yourself a handy OBD scanner which allows you to connect to car after battery reconditioning, and instantly detect any faults within the OBD software.
Batery repair
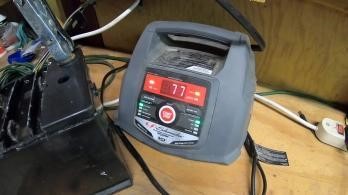
Either way you put your battery in the charger and all you get is a flashing red light, which according to the label on the charger means your battery is defective. It isn't just dead. It's "defective". I'm here to tell you you it isn't. You probably left it in the charger too long which weirdly drains the battery. You Can Fix a Rechargeable Battery That Won't Take a Charge.How to Fix an 18V BatteryHow to Fix a Ryobi 18v Rechargeable Battery
The rule of thumb is to heat your device only enough to be comfortable to touch without being uncomfortably hot. View at Amazon Detaching the display
Battery repair iphone 6s
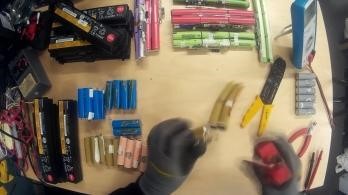
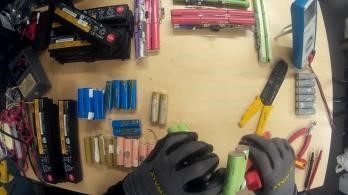
Any advice or idea where to get extra tabs, while I build the new battery, besides those that are attached to the cells and others that i sav from the old battery. thanks
Battery repairs near me
Repair iphone battery
Electric bike battery repair
Iphone 6s repair battery
Ebike battery repair
Repair battery iphone
Repairing battery
Battery repair
Battery iphone repair
Repairing iphone battery
Iphone battery repair
Repair ebike battery
Repair batteries
If you fill a battery with more energy than it's designed to take, then you will do a small amount of permanent damage to the battery. Over time, this damage adds up and it can lead to overheating and thermal runaway.
Repair of battery
I re-celled a laptop battery with 4 cells. After completion, I turned on the laptop but it didn't power up! The laptop does turn on with AC Adapter plugged in, but if I unplug the charger, the laptop shuts down, as if the the battery has been removed. System (Windows 8) shows that the battery has been charged [Plugged in, charging 100%] but the battery doesn't power the laptop! Why? Help!
As well as all of the above, there are some specialist battery packs that we can rebuild that don’t fall under any of these categories. So if you can’t find your battery by search, you can browse through all of our current batteries that can be rebuilt. If your battery pack is still nowhere to be seen on our website, click here to fill in a form and let us know all of the details of the battery that you need to be rebuilt, and await one of our battery experts to get back to you with an answer.
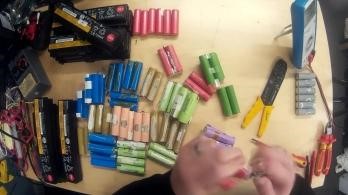
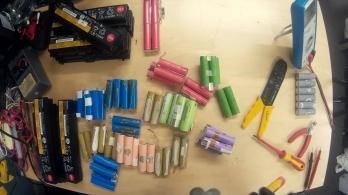
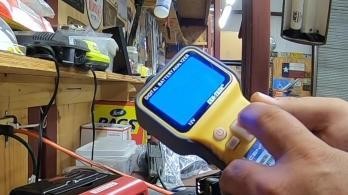
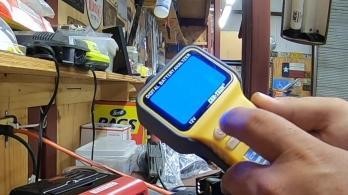
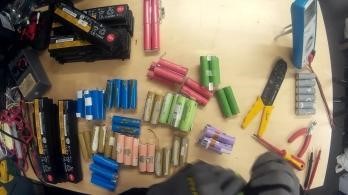
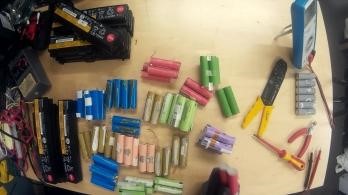
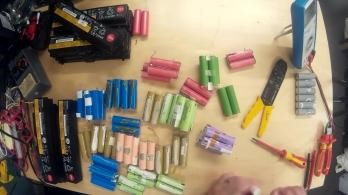
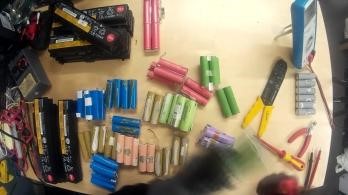
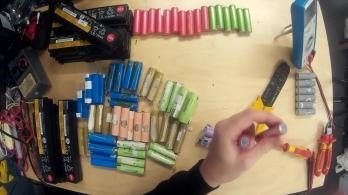
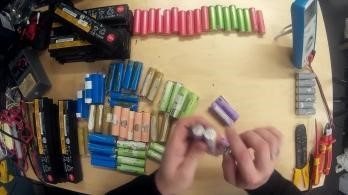
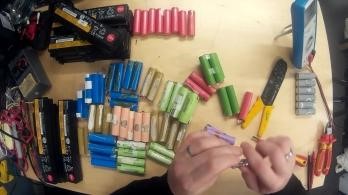
Step 3: After that, use a multimeter to check each cell group’s voltage to find the bad cells. If you find a cell lower than 2.5V it is more than likely bad and if you find a cell higher than 4.2 volts, it could be dangerous.
Iphone repair battery
Putting batteries directly in the trash is dangerous for the environment. Apple and all our authorized service providers are committed to recycling and disposing of batteries with the utmost respect for the earth. So recycle your device with us. Or drop off a battery from your AirTag. We’ll take it from there. On top of doing the right thing, your device may even qualify for a credit toward a new Apple product. Apple Footer Apple Batteries Service and Recycling Shop and Learn Shop and Learn + Store Mac iPad iPhone Watch AirPods TV & Home AirTag Accessories Gift Cards Apple Wallet Apple Wallet + Wallet Apple Pay Account Account + Manage Your Apple ID Apple Store Account iCloud.com Entertainment Entertainment + Apple One Apple TV+ Apple Music Apple Arcade Apple Fitness+ Apple News+ Apple Podcasts Apple Books App Store Apple Store Apple Store + Find a Store Genius Bar Today at Apple Apple Camp Apple Store App Certified Refurbished Apple Trade In Financing Order Status Shopping Help For Business For Business + Apple and Business Shop for Business Business Financing For Education For Education + Apple and Education Shop for K–12 Shop for University Education Financing For Healthcare For Healthcare + Apple in Healthcare Health on Apple Watch Health Records on iPhone Apple Values Apple Values + Accessibility Education Environment Privacy Supplier Responsibility About Apple About Apple + Newsroom Apple Leadership Career Opportunities Investors Ethics & Compliance Events Contact Apple More ways to shop: Find an Apple Store or other retailer near you. Or call 1-800-MY-APPLE. Privacy Policy Use of Cookies Terms of Use Sales and Refunds Legal Site Map
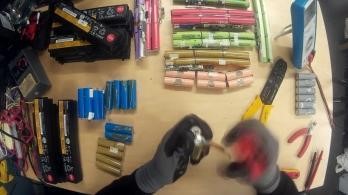
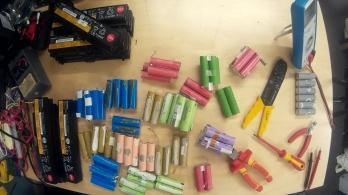
In this article, we will go over how to identify and fix a broken battery pack. We will also briefly explain how and why batteries fail in the first place.
The weirdest thing is why so many men who have experts in this topic are googling how to fix a battery that won't charge. ;) ~ karen!
Watch repair batteries
BU-911: How to Repair a Laptop Battery - Battery University
With proper care, most car batteries last four to five years. Be aware of the symptoms of a failing battery. When it’s time for a new one, follow this guide on how to replace your battery.
These guys did an Amazing job fixing my phone. I was heart broken when my phone fell out of my pocket and hit the pavement, shatter and bust my screen. I found these guys on Google and called. In 3 hours my phone was like brand new. Thank you so much!
Watch repair battery
Repair centres could potentially make a big difference in the life extension of lithium-ion batteries, but only if failed batteries actually find their way to these places. This requires well organised logistics.
Remove the screws holding the battery together. There's a hidden screw under a piece of plastic. You need to pry the plastic off to get at the screw underneath. I used a very thin screwdriver to pry it off.
Then why have SO many people thanked me for this post Peter? Which by the way isn't a post on pulse charging lithium ion batteries, it's a post on how to trick your charger into charging your batteries again. ~ karen!
Be Part Of Our Story!
Repairing batteries
I came here to ask this same question. there are no fuses or circuit protectors to check so why do you have to disassemble the battery??
Repair batteries
Again, like Lead acid batteries, the sulfate crystals actually prevent from charging as they block the terminals. These are easily remedied. For this, we need a flash camera capacitor. A number of cheap cameras have parts which can be disassembled and their parts used. Add a switch and battery holder to the capacitor. Stick the wires to the capacitor, connect them with battery holder, and switch. Keep in mind to have wires insulated and try not to touch wires or any device carrying capacity. Not put the alkaline battery into the capacitor and Nickel Cadmium battery into the battery holder. Switch it on and wait for LED to light up. Do the above steps repeatedly. If you hear a sound, you know you are in clear and Sufate crystals are being destroyed in the process. Although this looks complicated, the steps are easy to follow once you have assembled all the gadgets or components, and you get a reconditioned Ni-Cd battery!
Hybrid battery repair
Then why have SO many people thanked me for this post Peter? Which by the way isn't a post on pulse charging lithium ion batteries, it's a post on how to trick your charger into charging your batteries again. ~ karen!
Contact Us
My mom's phone suddenly crashed on her. She was absolutely panicked. Previously, when my dad had issues with his phone, we had brought it to the Mobile Klinik in the Bramalea City Centre and they were so good to him, and did a fantastic job fixing his phone. My mom headed over there and she too was treated well and her phone was fixed within a half an hour. I am so thankful not simply because they fixed my parents' phones, but also because they were so nice to them. Additionally, it is comforting to know that there is a fantastic business that I too would trust if anything ever happens to my phone. Thanks for being so good to your customers. You will most definitely be seeing us again when needed.
Batteries repair near me
Issues can be software-related, including glitches in a software update, brightness settings, use of power-intensive apps, location services, and more. It may also be hardware-related, like a degraded battery.
Great content, it will help in my business Thanks for sharing useful information. Respectfully, David, author of the blog https://agmbatteryguide.com/
Uh oh! If the battery in your car is dead, it can be a big inconvenience. There are two simple ways to recharge the battery: using a battery charger or using a running car battery. Follow these instructions to recharge it quickly and safely. With a Battery ChargerSafety FirstCharging SettingsFast Charge RateSlow Charge RateHow to Recharge the BatteryWith another Car BatterySafety FirstHow to Recharge the BatteryReliable Car CareShare This Article
Step 2: Pick a Time & Place How It Works
You didn’t leave a car door open or a light on. (We believe you.) But your vehicle just won’t start. You turn on the ignition, and all you get is the telltale clicking noise. Possibly followed by competing pronouncements of “Your battery’s dead” and “It’s your alternator” from anyone within earshot.
Often it is the old car batteries with highest demand for reconditioning, however, you also have house batteries for nearly free from scrap factories which can work for reconditioning as well. If you want to reduce energy for long time, you should learn how to recondition a battery! In addition, you might do good volunteering or side job of reconditioning batteries. Reasons why you should learn Reconditioning batteries With an increased demand and supply for batteries in professional and personal front, reconditioning battery is one skill that would never go waste. Why not learn it when it serves our purpose to earn extra bucks and make our planet habitable. In case you are worried about your safety, be at ease. If the technique is properly learnt, it is quite safe. You practically get your old/dead batteries for free! You see, safe disposal is top priority, and many seemingly dead batteries are getting prepared for a new life, and you can help them ease the passage. Batteries cost a fortune, and you are saving a hefty sum if you simply recondition it instead of buying another one. If you want to go green and save environment while working on renewable energy resources, this is a good opportunity. Not only you learn a skill that will be highly coveted in future, but you can also earn some extra cash for other pursuits. How to recondition your Dead car batteries
!
Iphone 6s repair battery
Iphone battery repair
Watch battery repair
Battery repairer
The material on Battery University is based on the indispensable new 4th edition of "Batteries in a Portable World - A Handbook on Rechargeable Batteries for Non-Engineers" which is available for order through Amazon.com.
The much larger point is, if you had even a basic comprehension on how rechargable battery backs work you would never find yourself in this situation. Its really not complicated. just remember like 3 basic things
We cary both College & Pro Merchandise for teams including: Baylor Bears, UT Longhorns. Texas Tech, A&M, Dallas Cowboys, Denver Broncos & more.
To prevent the battery from falling out of the device, you should hold it firmly when pulling out the last adhesive strip.
Although Epsom salt boasts the best results, you can try other alternatives in case you are out of the material.
Is there really a need to pull the battery case apart to do this. Can’t the same be achieved by touching the terminals when it is still fully assembled?!
Repairing batteries
Battery repairing near me
Battery iphone repair
Repair battery
However, a less generous view of Apple’s decision to increase the price of replacement batteries is that Apple may be attempting to make buying a new iPhone more appealing. As the price of replacing a battery increases, reports suggest that Apple is considering a significant price cut for its lower-end iPhone models.
Repair iphone 6s battery
Try the correct position of the battery pack in the plastic shell.
Emails used in this feature are not stored and will not be used for future marketing. Web Address*Email Address*I confirm that I have the recipient's consent to send recipient this email with this offer.*I have read and agree to the Terms and Conditions of Use and Privacy Policy* Send Email
You don’t need much space to complete a battery replacement, but you do need proper lighting. Do this job outside in the daytime or in a well-lit area indoors. Disconnect the negative terminal with a small wrench (8mm or 10 mm). Disconnect the positive terminal. Remove the battery holder/clamp and any bolts or screws keeping it in place. Remove the battery from the battery tray (it may be heavier than you expect).
The battery is the source of power for many crucial components in your vehicle. Remember to have regular car battery inspections and services performed regularly to save you both time and money. A battery check every oil change can prevent you from getting stranding out on the road.
Thanks for keeping it simple! FYI - from other sources, if the battery falls below 9 volts the charger will reject it as bad. -Randy
Battery watch repair
Battery repairing
Battery repair
Batery repair
Don’t utilize tap water as it includes chemicals that negatively harm the battery.
No problem! Just give us a call to arrange your mobile battery replacement with a LubeVan customer booking specialist!
Fortunately, our batteries tend to last an exceptionally long time. That’s because we use the latest absorbent glass mat technology in all of our products, which makes them less susceptible to sulfation and leaks.
Description: These are compulsory for your safety when you deal with Lead acid batteries. The acid in batteries are extremely painful and corrosive if it ever enters your eyes.
I've seen an atrouceous comment here advising to discharge the battery completely
Step 7. Set the Multimeter to read volts. For testing an 18 volt battery choose the 20 volts setting. This will give you the most accurate reading. (If you don't have a multimeter skip to Step 9 and hope for the best)
Electric bike battery repairs
Battery iphone repair
Repair watch battery
Electric bike battery repair
Save with the latest discounts at your Battery Joe Waco location (South Valley Mills Drive by Jack in the Box, across from HEB) on our Coupons Page. We have batteries for everything for the Waco area with free Car Battery Installations and free Car Battery Testing! Battery Joe also specilizes in quality same day iPhone repairs at a cost-efficient price for all models with same day services and delivery at your location within the Waco city limits. We fix cracked iPhone screens and complete iPhone battery replacements for the Waco area within the same day along with additional device repair services (charging port repairs, speaker repairs and more). See current pricing for common repairs below: